Unlike the web interface of your encoders, BoraGrid allows you to insert images over the video at any time during your transmission.
Notes
- The size of the image cannot be higher than the video resolution; otherwise, an error will occur.
- The image file must be in PNG or BMP format. More recent versions of the encoder also accept the TGA format.
- Give preference to the PNG format which is more modern and generates smaller files than the other two.
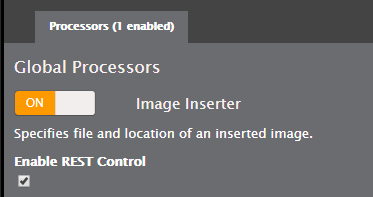
- In the web interface of your encoders, in the event configuration tab, the “Image Inserter” option must be “ON” and the “Enable REST Control” option must be checked.
Creating a list of images
In Boragrid you can enter the data for all the images you intend to use.
Go to Settings page then select the Images item.

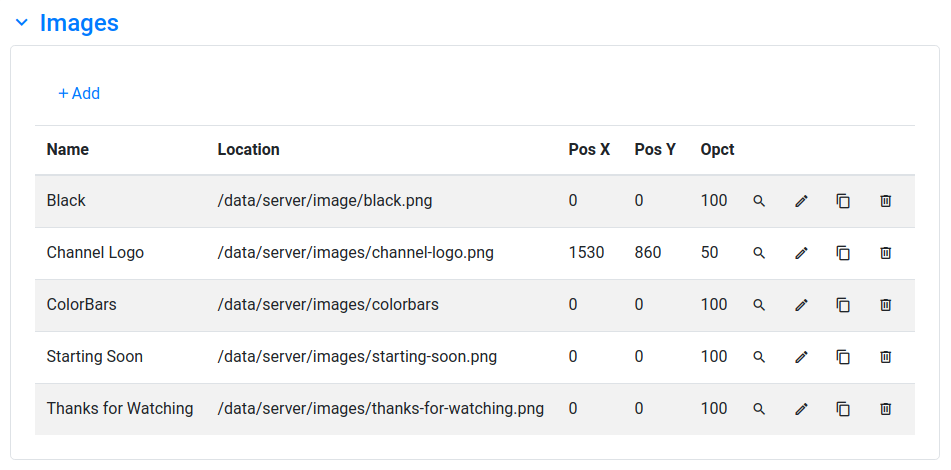
If you want to view, edit, duplicate or remove an image from the list, click on the corresponding icon on the right side of the list.

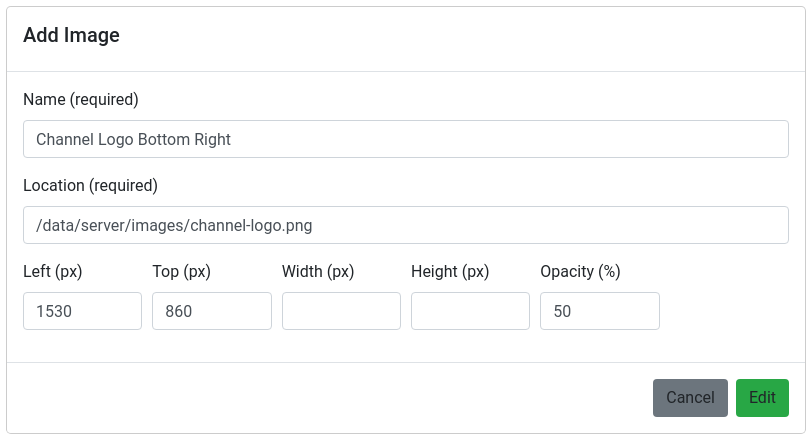
The image data entry form will appear. Enter the parameters for each of the images.
Fields
Name
A name for the image. Use names that make it easy to identify it.
e.i. Channel X color logo right down corner
This field is required.
Location
Path of the image file relative to the encoder.
e.i. /data/server/images/channel-logo.png
This field is required.
Left
Placement of the left edge of the image relative to the left edge of the video frame, in pixels. 0 is the left edge of the frame.
Top
Placement of the left edge of the image relative to the top edge of the video frame, in pixels. 0 is the top edge of the frame.
Width
The width of the image when inserted in the video, in pixels. Leave blank to use the native width of the image. The original image will be scaled up or down, to the specified width.
Height
The height of the image when inserted in the video, in pixels. Leave blank to use the native height of the image. The original image will be scaled up or down, to the specified height.
Opacity
The opacity of the image, as a number from 0 to 100. 0 is transparent. 100 is fully opaque.
Inserting and removing images during a transmission
By using the control panel
Use the control panel to insert or remove images from the events of all the Event Controller modules in the grid.
In the control panel of the Main Control page, locate the image inserter control.
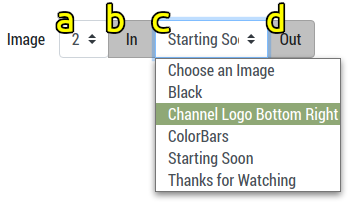
- Select the layer on which you want to insert the image (a).
- The layer number indicates which images will be below or above the others. Layer 0 is the lowest and layer 7 is the highest.
- The amount of layers available depends on your subscription plan.
- Choose an image in the selector (c).
- To insert the image into the selected layer, click the In button (b).
- To remove the image that is on the selected layer, click the Out button (d).
- The layer will be cleaned regardless of which image is selected.
By using the right-click menu
Using the menu of an Event Controller module it is possible to insert and remove images only in the event of this module.
Right click on the Event Controller module that you want to insert or remove the image. The module’s menu will appear.
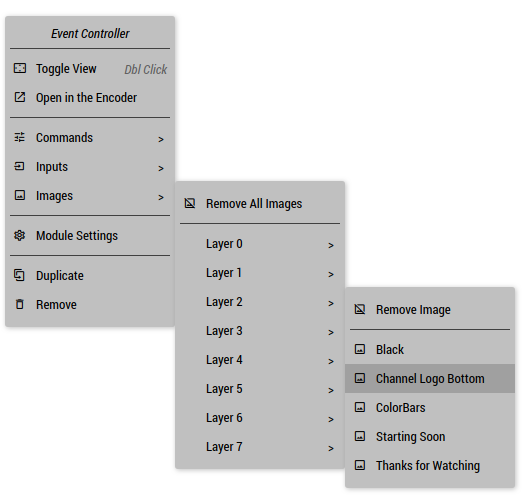
Inserting images
Select Images and then choose the layer. Lastly, select the image.
Removing images
To remove the image from a specific layer, select Images and then choose the layer. Finally, select Remove Image.
To clear all image layers for this event, after selecting Images, select Remove All Images.
